Tuesday, December 31, 2013

Valentine's Day

I love making dinner extra special on Valentine's Day for sweeties! This year I opted to make breakfast for dinner...it was an easy way to incorporate hearts into the meal!

First we'll start with the table:

LOTS of red! I used fancy glasses...which are really just plastic, but the kids get a kick out of using them and I don't have to worry about anything breaking! :)

Each chair had a felt heart banner. Super easy to make. Just cut out a bunch of hearts, then cut two small slits on both sides. Then string your twine or ribbon through. I opted to tie each set together. But either way will work! 

I placed large doilies underneath glass plates to add some lacy sweetness. Each child had a HUGE chocolate kiss and little gift (in the heart box). 

Of course chocolate strawberries for dessert! 


Sparkling OJ  and Shirley Temples to drink - both garnished with a cherry and heart flag

For dinner or breakfast or ....hmmmm. For the meal we had heart shaped pancakes and heart pressed french toast. I tried heart shaped bacon in the oven...big time FAIL...but it still tasted good! 


Take advantage of special days to spoil your loved ones! It's worth all the extra time and effort!

Hershey Kiss Roses


A super simple fun and easy way to show your love on Valentine's Day! My middle child chose to do these for teacher gifts for Valentine's. We tied three together with twine and a little tag that read "Roses are red, violets are blue, for the World's best teacher; I choose you!"

Chocolate Kiss roses have been around for years, but just incase your not sure how these little beauties went together...here's a recap.


Supplies:
  • tape or glue dots
  • scissors
  • florists tape
  • plastic greenery
  • a bag of Hershey kisses
  • wooden skewers
  • red tissue paper or red/pink cello paper


  1. Pair up all the kisses; and adhere together using a rolled up piece of tape or glue dot
  2. Clip your greenery. Be sure to leave a stem on the leaves. Enough to tape around so that they can be attached to the wooden skewer. 
  3. Cut 3 inch squares out of the paper
  4. Carefully stick a skewer into one end of the hershey kiss pair. Then wrap the square of paper around the kisses. I put the kisses in the middle, pull down the sides and twist. Then wrap a piece of florists tape from the tip of the kiss down the stem. Add a leaf about an inch or so from the kiss and keep taping down the skewer. I unwrap a bit from the roll and start winding- never cutting it until I get to the bottom. Hard to know how much you will need per flower and it keeps it wrapped up for you so you can pull it tight. 
One bag of kisses makes 18 roses and took me about 30 min start to finish. 


Holiday cheer

I found a fun way to spread a little holiday cheer and will have visitors smiling! Grab a few dry erase markers and spruce up family photos...Rudolph style!


The best part is when your company finally notices and the inevitable chuckles that follow! The kids had a blast doing this! And clean up is a cinch. Just use a wet washcloth. You can also use a little glass cleaner if needed. I had no trouble cleaning mine after 4 weeks. :)

Monday, December 30, 2013

Ice cream Bar Birthday Party

This was the perfect idea for our 2 year old! She LOVES ice cream! And I've learned to just keep the early birthday parties simple! The little ones get overwhelmed, there's lots of people and stuff going on...so sit back and relax with this easy party idea! Best part is the topping bar! Guests serve themselves! So you can chill with your little birthday sweetie and enjoy the company!


Party basics:

vanilla ice cream served in either waffle cone bowls or little ice cream dishes (we dipped the rims of our waffle cone bowls in sprinkle to add a little fun and color).

Toppings Bar:

  • crushed oreos
  • chopped up snickers
  • chopped up heath toffee
  • chocolate syrup
  • gummy bears
  • caramel sauce
  • crackle coat (the chocolate that hardens)
  • m & m's 
  • reese's pieces
  • fresh cut strawberries
And of course spray whip topping and maraschino cherries with the stems! 

The toppings may look at little overwhelming...but you don't need alot of each topping. Just a few regular sized candy bars. We served the ice cream to keep the line moving and to help out the other little ones. It's also easier to control the portions. Not that we cared, but you would hate to run out half way through or on the flip side end up with 2 gallons of left over vanilla ice cream. 

In the end it was a fun, simple 2nd birthday for our baby girl! 


Party favors: The birthday girl's favorite...BUBBLES!


Extra wands too! 


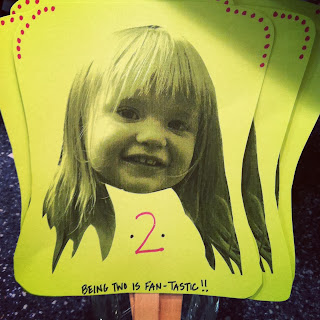
 And card stock fans...it was 102 degrees that day! Always make sure the guests are comfortable! :)


Friday, December 27, 2013

monogrammed tags

I tried something new this year with gifts! We are always sorting through gifts trying to find the ones that are for the cousins and grandparents, the ones for our kids and the ones for friends etc. This year I picked a different paper for each group. So our family gifts (for the girls) were in green chevron paper, extended family gifts that we would need to take with us during travels were wrapped in red and white paper, and friend gifts were in a floral green and white. It helped alot!

So our family had chevron paper. But we give gifts to the girls and the girls exchange gifts to eachother. So to separate or distinguish between those- I decided to just monogram all the gifts from John and I. It was an easy way to tell who the gift was for and who it was from.

I lucked out and found these adorable wooden stickers at Michael's... an eight pack of stickers for $1- not bad! And they are wooden so we can use them again next year if needed!


I think they turned out adorable! I loved them! 

Monday, December 23, 2013

Easy outdoor decor for winter

Most people tuck their pots and planters away for winter. But I wanted to share some super easy ways to spruce up your pots and keep them pretty all winter long!


On our property we have white pine, blue spruce, yews other evergreens. So when the weather turns cold and continually staying in the 30s or below- I walk around the yard with my clippers and a bucket.

I cut low lying branches from a variety of trees. Cut larger bows, you can always trim them down later. Feel free to also collect dead branches, sticks and pine cones...these also work nicely in the planters.

I fill a few buckets with water and set them in garage. Then I soak all my clippings overnight. This ensure they last through the season and not dry out prematurely.

The next day I lay out all my branches in groups. And then start layering the pots.

Blue spruce bows hang nicely so I put those on the bottom. And then top those with yew clippings. I stand some white pine clippings in the back. White pines are airy and thin - so they basically just add height.

Start nestling in some pinecones. I sprayed painted some branches white, but red would be pretty too. Stick those into the dirt to add more height and color. If your planters have no dirt- you can use styrofoam, just place it on the bottom of the pots before you start. You may need to anchor them down with some rocks. 

You end up using more than you think...so do your spring trimming early and cut back more than you think when gathering branches!


Beautiful birch wood I saved from when we had to cut one down! 


If you end up needing more bulk...you can always fill in with faux greenery. I added a few sprigs from the craft store. But for the most part this project was FREE!!! So easy and cheap! 


Friday, December 20, 2013

Monkey bread LOVE

My girls love Saturday mornings...and it's not because they get to sleep in! It's because I usually bake something yummy for breakfast! A winter favorite is Monkey Bread! It's so easy and smells divine while baking...not to mention it's sinfully delicious!!


Here's the recipe:


  • 4 cans of buttermilk biscuits (any brand- the small tubes)
  • 1 stick of butter
  • 3/4 cup white sugar
  • 1-2tbsp cinnamon (depending on how cinnamon-y you like things)
  • 3/4 brown sugar

Mix white sugar and cinnamon in a bowl. Preheat oven to 350. Add butter and brown sugar to a sauce pan and simmer until you get a smooth consistancy. While the butter and sugar are melting - cut up each biscuit into 4-6 pieces. Great job for the kids to help! 
I use my kitchen shears and it goes super quick. 

Place biscuit pieces in the cinnamon and sugar mixture, roll them around until well coated. Do this in batches- it will make it easier to coat everything. Then place the pieces in a 
greased round bundt pan. 

Once all the biscuits are cut up, coated and in the pan- pour the melted sugar mixture over the top. Bake for 40-45 minutes. The take out and let cool for 5 minutes! Super important!!! Then place a plate or platter on top of the pan and flip. Lift the pan, admire the tower of ooey-gooey goodness and dive in!

Thursday, December 19, 2013

Advent Calendar

Here's a quick and easy Advent Calendar. I have been infatuated with the advent calendar idea forever! There are tons that I loved, but I never wanted to spend as much as they were going for. And the boxes were always really small. In the end, I made this one.

I was at the craft store and happened across these adorable burlap bags. So many possibilities! But I immediately thought of the advent calendar. Once I was home, I assembled all of my supplies and set to work. 


  • I numbered the bags 1-25 with a sharpie and some stencils. 
  • Grabbed an old frame, removed the glass and roughed up the wood with a sander. 
  • Used a staple gun and attached chicken wire to the back. It helps support the bags so they don't push back once filled and add a little touch of shabbiness. 
  • Whip stitched some red and white twine through the bags in numerical order. (for my frame I did 5 rows of 5 bags. )
  • Hammered in some tacks to which I attached the twine rows. 
  • Hot glued some greenery and pinecones to the top

Pretty simple!!!

Here's how she turned out! 


I also attached little clues to the bags...like the snowflake ornament, cookie cutter and holiday light. Some gifts were obviously too big for the little burlap bags...so they are wrapped and labeled with their corresponding number. The tag in the bag will alert them if there is a gift too. For example, "Stay toasty and warm with a cup of hot cocoa! p.s. open gift #3"

So here are our activities!!

  1. chocolate truffle
  2. Hug your sisters
  3. Hot chocolate (travel coffee mugs for each)
  4. Write or call a grandparent
  5. Grinch poo (green tic tacs with little poem...follow the link)
  6. Cut out snowflakes (snowflake ornament)
  7. monogrammed playing cards
  8. Make gingerbread houses
  9. Gather clothes to donate from closets
  10. Share your favorite Christmas memory (thumb drives for each)
  11. Do 5 good deeds today
  12. Compliment someone (pack of gum)
  13. Listen to everyone's favorite Christmas song (iTunes card)
  14. Drive around and look at Christmas lights (holiday lightbulb)
  15. Decorate sugar cookies for neighbors (cookie cutter)
  16. Read a Christmas book
  17. Make someone smile (chapstick)
  18. Make a list of 10 things you are grateful for (pencil)
  19. crocheted scarves (made by me!)
  20. Watch a Christmas movie together
  21. Mistle toes (nail polish)
  22. Make a snowman, snow angel or have a snow ball fight 
  23. Notecards personalized for each girl
  24. Christmas pajamas
  25. Merry Christmas...check your stockings!